Ireland (EUR)
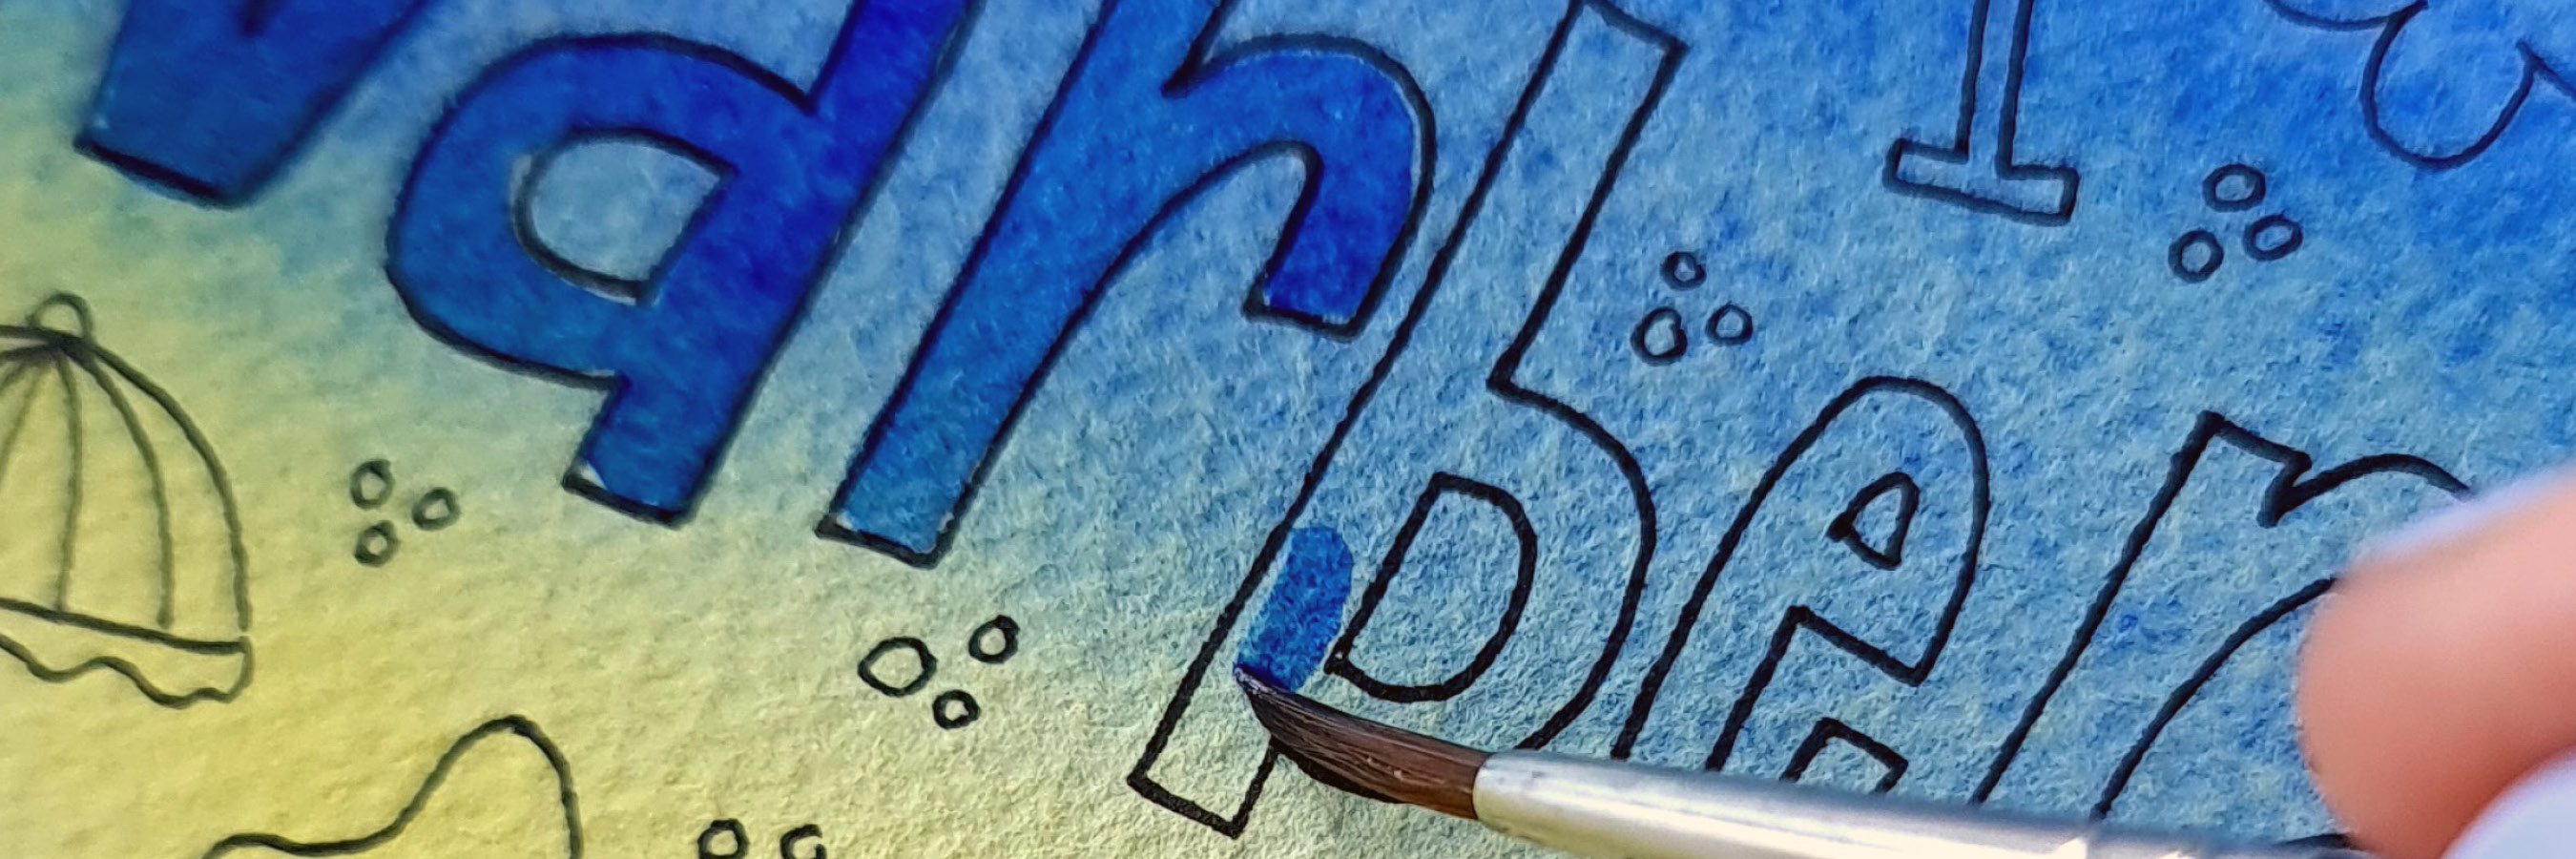
With just two colors and a pair of fineliners, you can easily create a personalized postcard.
Perfect as a memory for yourself, or as a greeting to loved ones from the holiday vacations. Lise, also known as the lettering artist Ink&Lise, guides how she, step by step, creates her very unique postcard. A summer activity that suits all levels of experience in watercolours and lettering.
")
")
")

Sending a greeting in the form of a postcard from the holiday used to be almost mandatory, even though the postcard often came home after you arrived. And it's damn nice to find postcards in the mailbox. So I think we can take back the tradition - by making a handmade postcard.
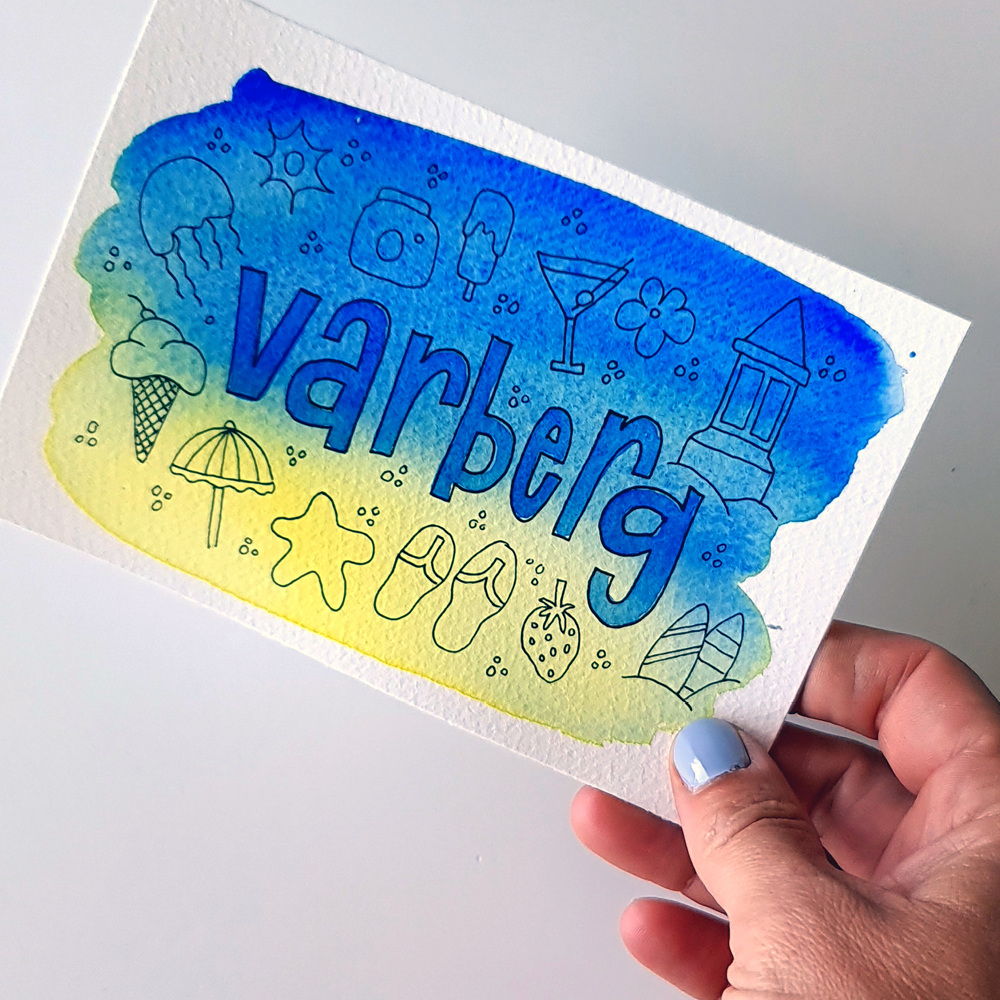
Well, but I can't draw or paint, you think? Great, neither can I, but there are little simple shortcuts that you can use to create a completely unique travel postcard whether you feel comfortable with a brush in your hand or not. I’ll show you how to paint a colourful, abstract background that you can fill up with letters and symbols until you get a collage that says exactly what you want to say. In my case, I painted my sense of the beach here in my home town of Varberg, Sweden – the colors represent its yellow sand, blue skies and sea and some green reeds and grass. On it, I drew the things that I associate with summer here in the form of simple little symbols.
Not having to depict anything in an exact manner is liberating for those of us who are not so used to drawing and painting landscapes, and at the same time this will perhaps be an even better depiction of summer than a perfect watercolour painting. In addition, the watercolour paper is thick enough to become a steady postcard that can cope in the mail without envelopes.
I have used the following materials:
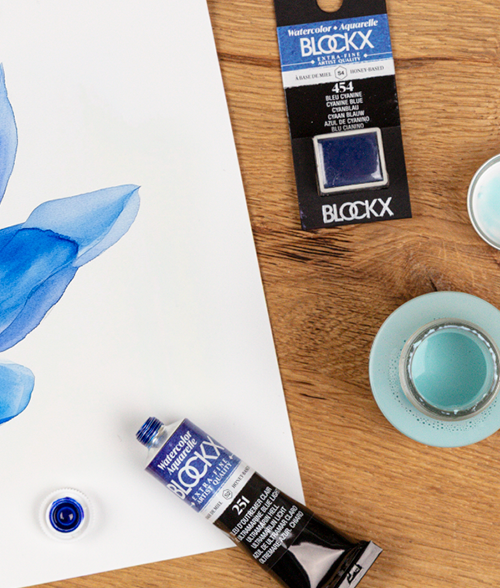
W&N professional water colour tube
You can buy a whole set with a bunch of colors, but you can also start by buying only one pair - I used the colors Winsor Lemon and French Ultramarine. Solid watercolours work just as well, of course.
W&N professional brush
Quill medium and round size 3. Round brushes with synthetic hair that are super comfortable to paint with and hold a lot of colour.
W&N Fineliner
Size 0.3 and 0.5
W&N Water colour paper block 300 gms
This paper is glued together on almost all sides, which is great. Let the paper sit while painting, don’t remove it until it’s dried to make it less dented.
In addition, you’ll need water, a scissor/cutter and maybe a ruler.


How to - Step by Step
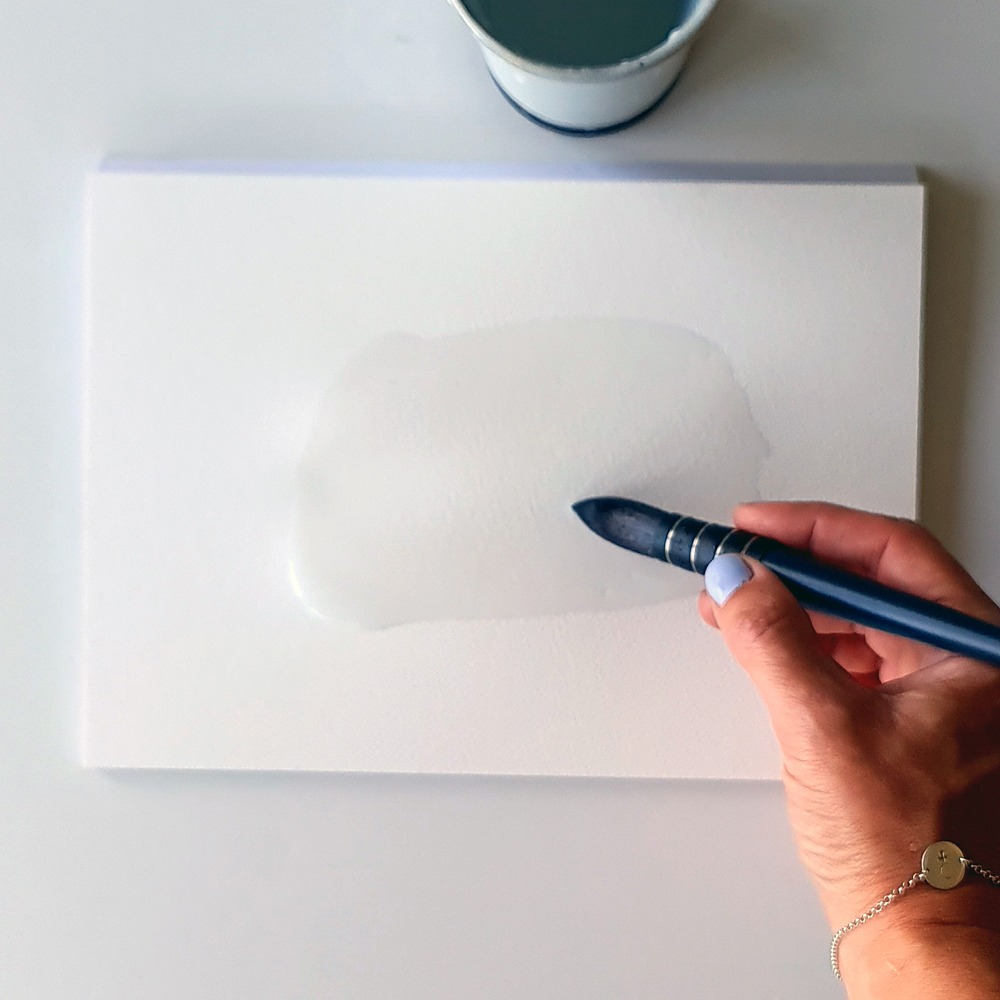
Step 1
To get a nice gradient (transition) between our two colors, we run wet on wet technique,which means you add color on a damp / wet paper. Dip the large brush and paint a rectanglewith water–it should be a little uneven at the edges.
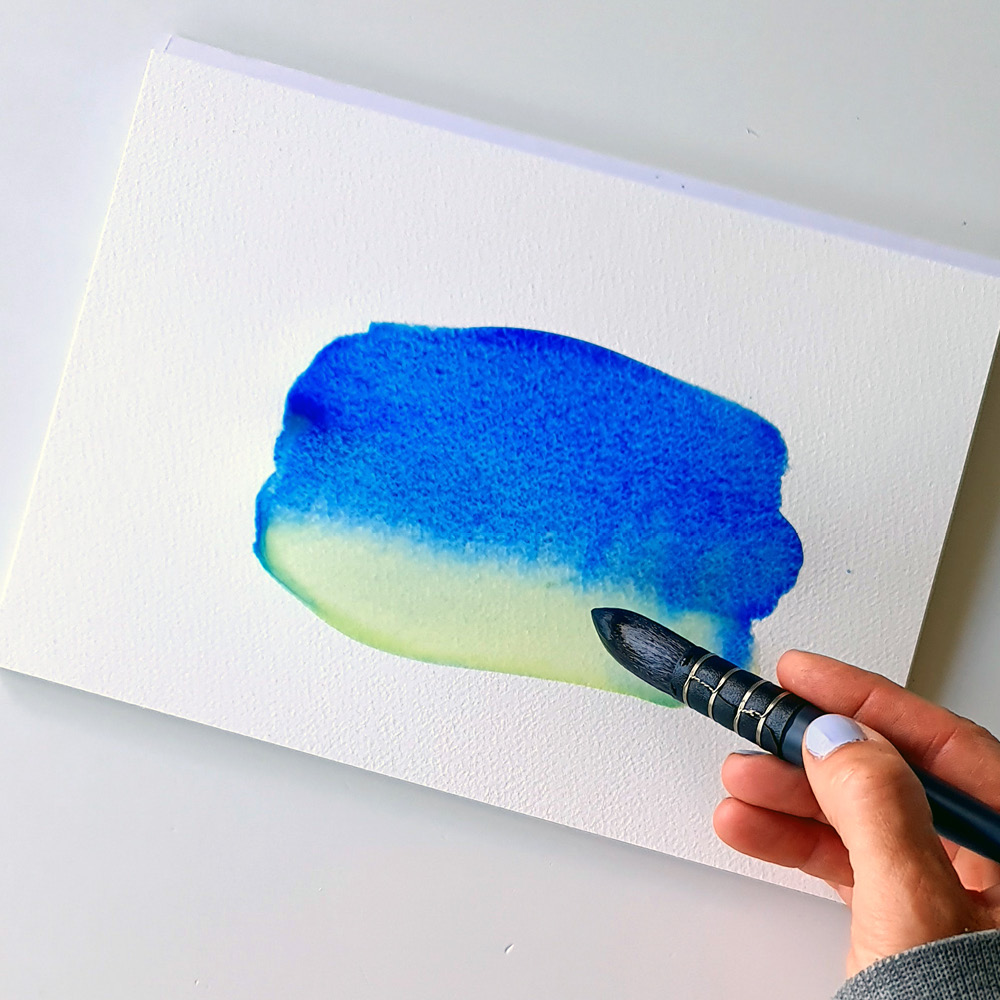
Step 2
Add color. I have chosen yellow, which may represent the sand off the shores of Varberg, and blue, which may act as heaven and sea. The very background that we are painting now should be very abstract, therefore it does not matter exactly how the colors will look. Don’t skimp on the water or the paint – just pour on! Tip the block up and down to make the colors flow into each other. Where they meet, it gets green – which for me stands for grass and reeds. Allow to dry.
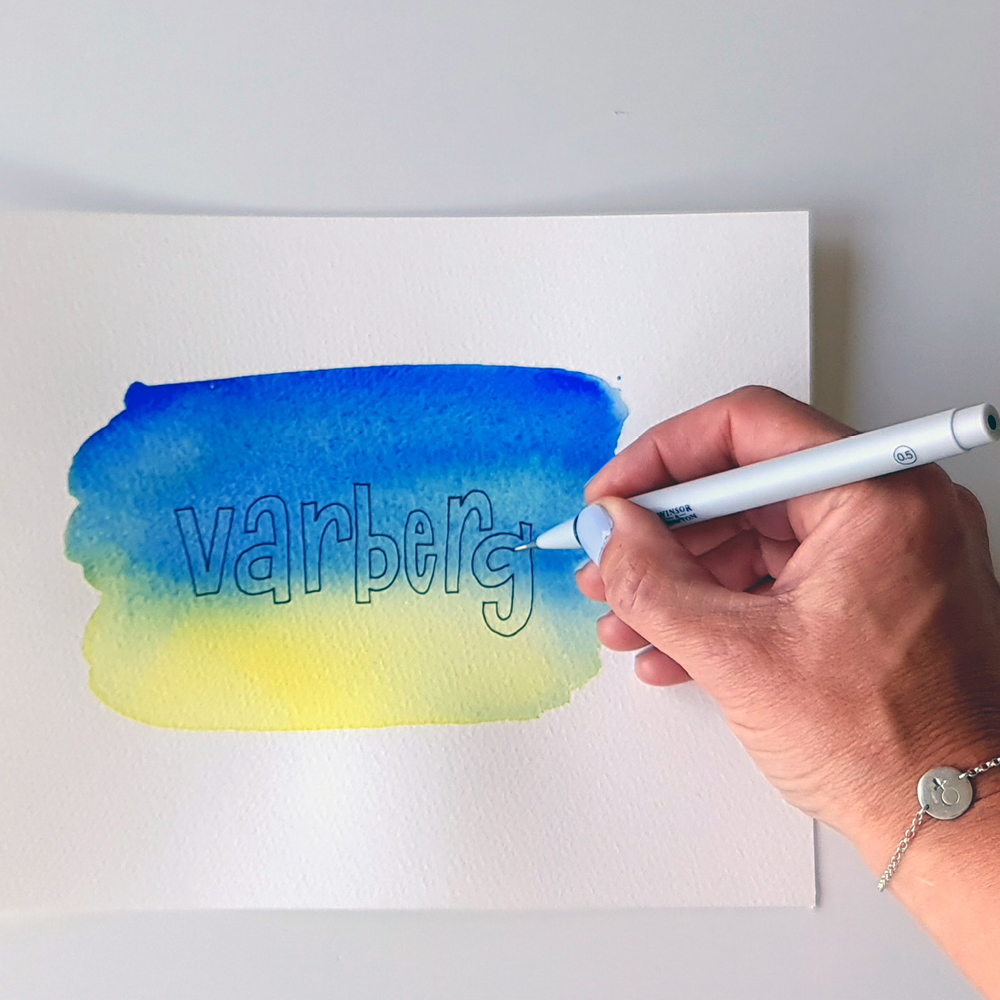
Step 3
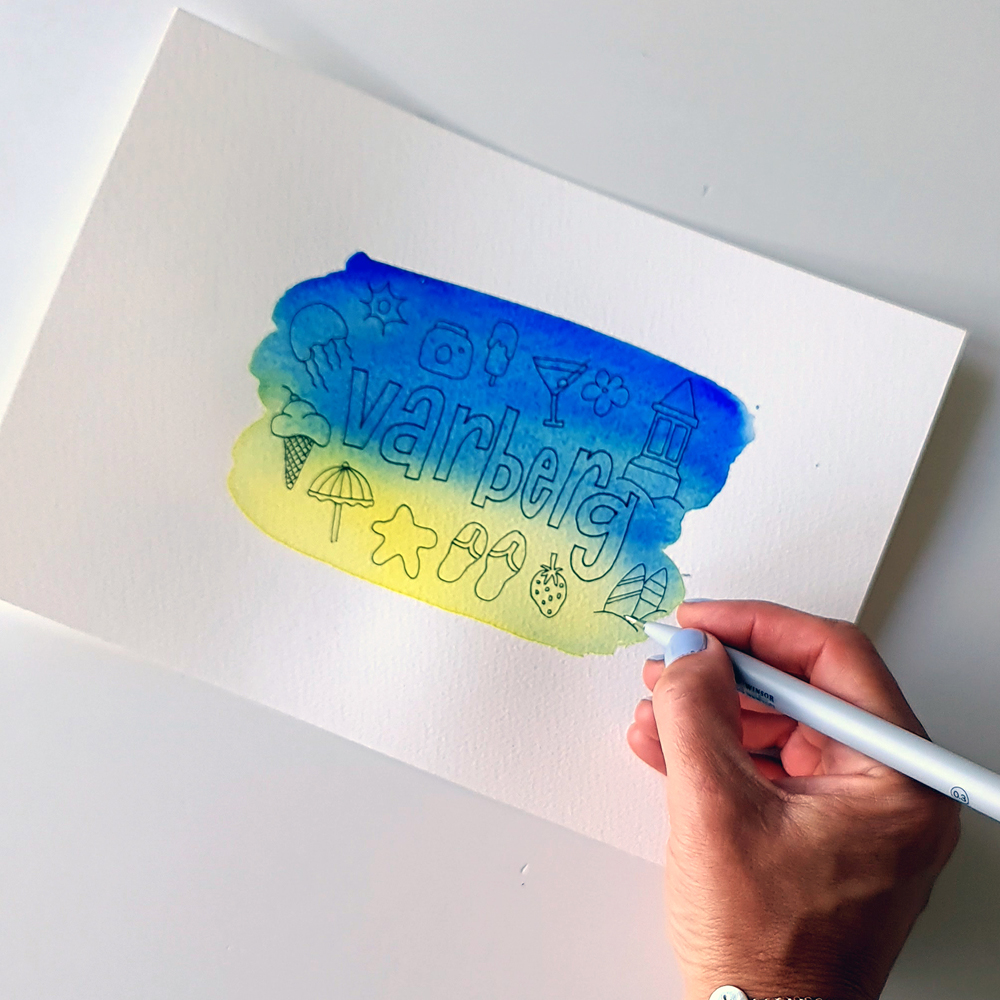
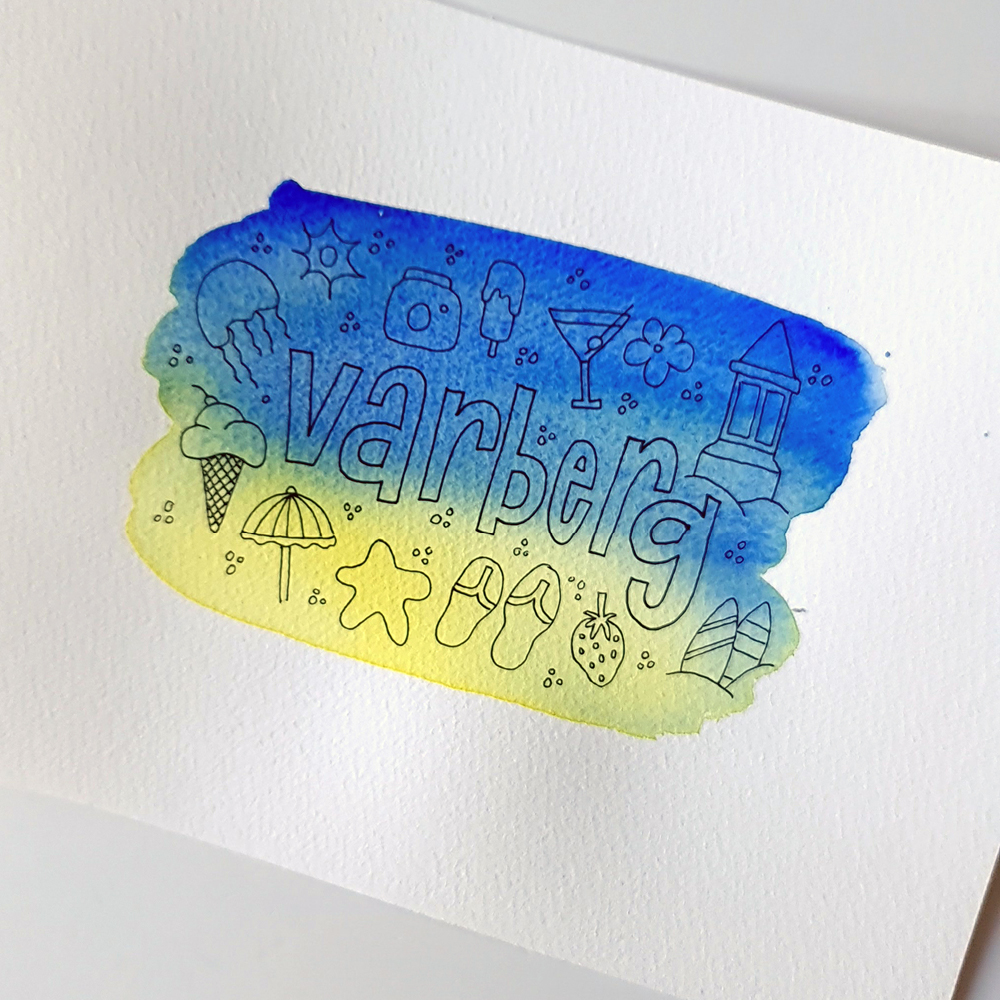
Once it's dried, write your hometown’s name (or whatever name you feel like) on the background. I used the fineliner size 0.5 for this step. This is going to be a collage so messiness is rewarded! The letters can be uneven and a little jumpy, and it is undeniably a plus to let go of the agony of trying to write straight and even, right? Before you start, check how big the letters can be to fit the paper. If there is a lot of space left over, you can always throw in some exclamation mark.
Step 4
Now it’s time to add some symbols that you feel represent what you want to say. In my case how I experience the summer in Varberg. Symbols are simplifications without a lot of details, so don’t overthink stuff! If you want, you can draw them a couple of times on a piece of paper first, to know roughly how to do it.
Step 5
The next step is to fill up negative space with small rings, dots, stars or whatever you feel like. These bind the whole collage together and evens it out if there happen to be large voids somewhere. It's all in the details!
Step 6
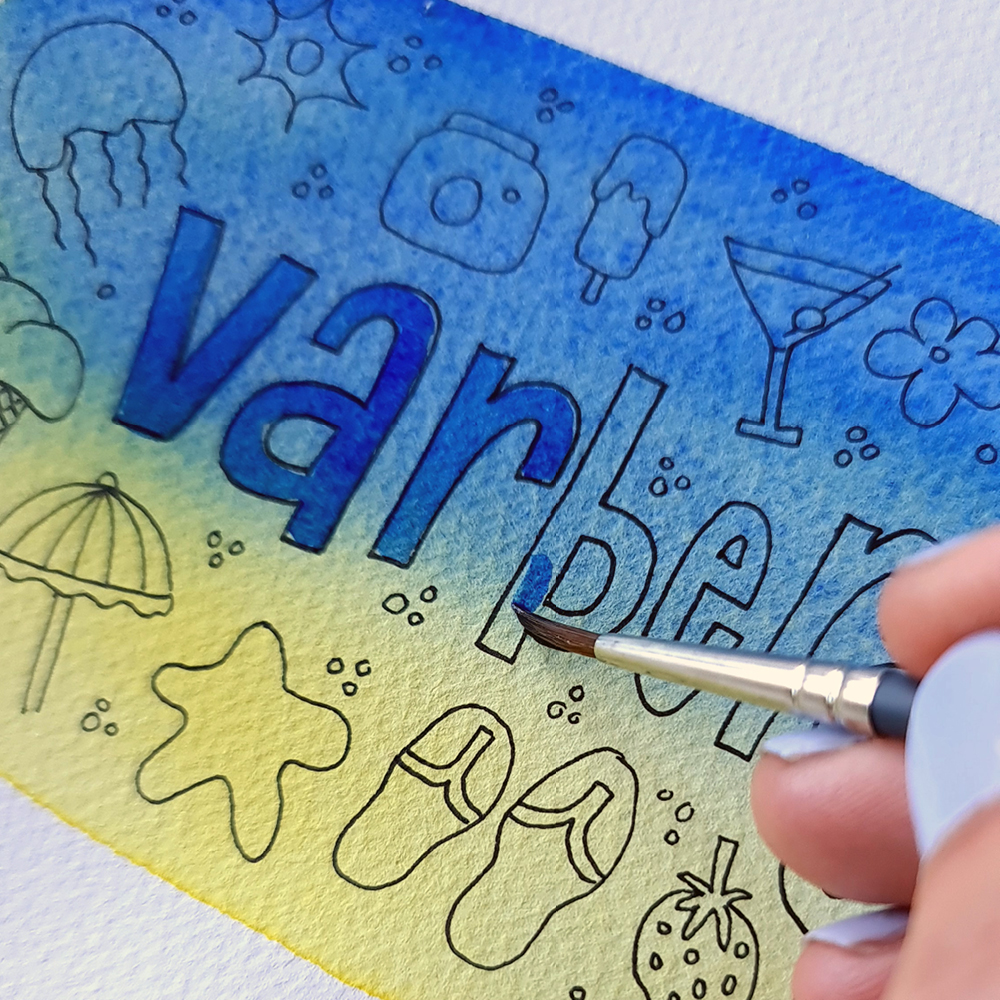
Then I filled in my letters with the same blue color that I had used before. It looks darker because I don't use as much water. You can also fill in the symbols if you want, it’s all up to you. I used the smaller brush, size 3, for this.
Step 7
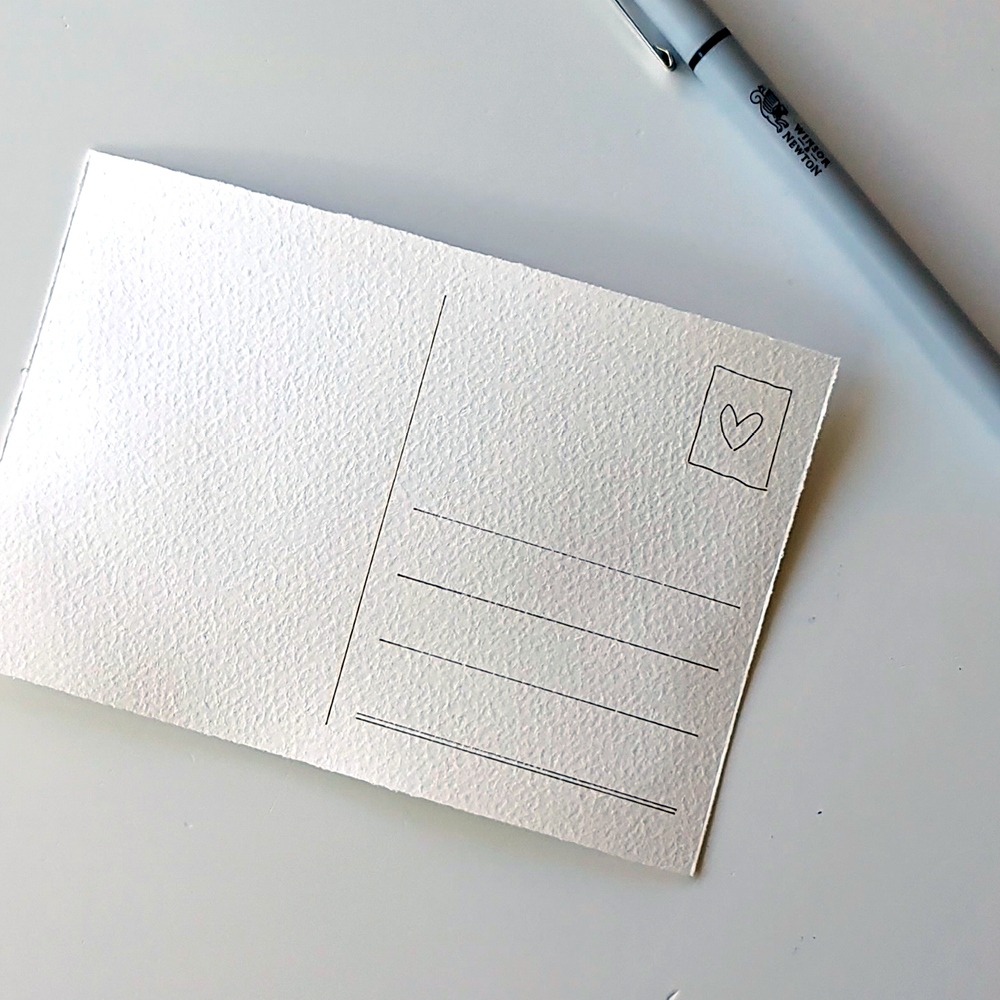
Use the ruler and draw a frame in a postcard size. Cut the paper, and draw the lines on the back, where you will write the address.
Step 8
Now the painting is done! Yay! With only two colours and a couple of finelinersyou managed to create a totallyunique, colourful and personalized greeting card.

Lise Hellström
@inkandlise on Instagram